ATI/AMD篇 原文出自: davelv按:amd对linux驱动支持真的很让人感到郁闷,我为了安装显卡驱动重装了不下三次系统。。。 Nvidia篇 rpmfusion安装法: sudo rpm -ivh 完成后,即可安装nVIDIA驱动。 sudo yum install akmod-nvidia akmods kmod-nvidia 稍等片刻,即可安装完成。 sudo yum install akmod-nvidia-173xx akmods kmod-nvidia-173xx 对于Geforce 4或者更旧的显卡,你可以输入: sudo yum install akmod-nvidia-96xx akmods kmod-nvidia-96xx 安装完成后,重启计算机即可。 sudo yum install gcc kernel-* 然后,如,我的GeForce 8600GT显卡,{zx1}驱动为180.27,到nVIDIA官方网站下载驱动,封装格式为run,下载完成后,把电脑切换到init 3模式。打开终端: sudo init 3 此时会漆黑一遍,屏幕显示命令行登录界面,用root帐号登录,输入root及其密码,即可使用命令行界面。然后打开驱动包所在目录 如:cd /home/fedora 接着 sh NVIDIA-Linux-x86-180.27-pkg1.run 驱动包将会自动解压,并进入安装界面,然后按着提示安装即可。安装完成后,程序会自动退出到命令行界面。紧接着输入 nvidia-xconfig 更新一次/etc/X11/xorg.conf文件,重启一次即可。 davelv按:据圈内人士的经验来看,Nvidia的驱动无论是Windows下还是Linux下都要比AMD/ATI安装更方便,更稳定。以后 买显卡可以多考虑N卡(dave自己买的A卡--!),另外建议去官网下载驱动http://www.nvidia.cn/Download /index.aspx?lang=cn Intel篇
In general, Intel graphics driver is well integrated in Linux distributions so users won't worry about the driver setup. This guide is for those users who would like to build the latest driver from scratch. This will be useful when trying the upstream stuff and customize the graphics driver. Section 3 is for people who only need build the 2D driver to try a new 2D feature or bug fix. Section 4 and 5 are for people who want to build the whole stack including 3D. To make the Intel graphics chipset work, below components are needed: 1, kernel module agpgart and drm; The source of kernel modules is included in Linux kernel. 2, libdrm; Libdrm is included in freedesktop drm source. 3, Xorg 2D driver: xf86-video-intel; 4, Mesa and 3D driver; To get the detailed download address for above components, please refer . In order to test or use the latest Intel X driver, you typically don't need to upgrade other components of the graphics stack, like Mesa or the DRM drivers. In order to build the driver, you'll need several development packages installed (list taken from the Fedora build requirements for the driver): If these packages are available, building should be as simple as: Note that depending on your distribution, you may need extra flags, like --prefix=, --exec-prefix=, --libdir=, --sysconfdir=, etc. depending on where your X server is installed (see ./configure --help for details). Once the new driver is installed, make sure your xorg.conf file (often in /etc/X11/) points at the new driver, which should be called "intel" or "i810" assuming the "make install" step created the appropriate symlinks. We suppose you have downloaded all components under directory $DOWN_ROOT except kernel source. 4.1 Linux kernelJust using an upstream kernel is fine in most cases, and you can build customized kernel if needed. 4.2 libdrmBuild and install libdrm: $ cd $DOWN_ROOT/drm $ ./autogen.sh Note: libdrm installs to /usr/local/lib by default. To install in /usr/lib run: $ ./autogen.sh --prefix=/usr --exec-prefix=/ $ make $ make install libdrm.so will be installed to /usr/lib. 4.3 Xorg 2D driverIf you install xorg in another directory(refered as $XORG_DIR) instead of overriding the xorg shipped in your Linux distribution, you need set two macros at first: $ export PKG_CONFIG_PATH=${XORG_DIR}/lib/pkgconfig:$PKG_CONFIG_PATH $ export ACLOCAL="aclocal -I ${XORG_DIR}/share/aclocal" Of coz, if you install xserver to another directory, you need compile all xorg modules. As for the detailed guide about xserver and xorg module compilation, please refer to . Note: You might need to use the latest Xorg and xserver release to sync with the latest intel driver. The compilation of 2D driver is simple: $ cd $DOWN_ROOT/xf86-video-intel $ ./autogen.sh --prefix=${XORG_DIR} $ make && make install At last, 2D driver library file (intel_drv.so) will be installed to $XORG_DIR/lib/xorg/modules/drivers/. 4.4 Mesa and 3D driverYou can refer for new building process and skip this section. If you only need Intel driver, you can specify it when run autogen.sh by adding option: --with-dri-drivers="i915 i965". 5.1 Load kernel modulesIf agpgart and drm are not compiled into kernel, when system boot up you need load these kernel modules: agpgart, intel-agp, drm and i915. To automatically load kernel modules when system boot up, you can edit file /etc/modules to add modules' name (on Debian/Ubuntu); or edit file /etc/rc.local to add lines such as: modprobe agpgart. 5.2 Enable Intel driverMake sure intel driver is used in Xorg configure file (usually is /etc/X11/xorg.conf): Section "Device" Identifier "name" Driver "intel" Entries... ... EndSection 5.3 Enable DRI(Direct Rendering Infrastructure) is a framework for allowing direct access to graphics hardware under the X Window System in a safe and efficient manner. You need enable DRI in xorg.conf. Firstly, make sure the and DRI modules are being loaded: Section "Module" # ... Load "glx" Load "dri" # ... EndSection Then, set the permissions for DRI appropriately. To allow anyone to use DRI, do: Section "DRI" Mode 0666 EndSection After restart X server, you can check whether direct rendering is enabled by running glxinfo, the output of glxinfo should show: direct rendering: Yes [1] - Intel Linux graphics website. [2] - Document about building and installing whole stack. [3] - Document about building and installing Xorg. 转载自:http://intellinuxgraphics.org/install.html 下载驱动:http://intellinuxgraphics.org/download.html davelv按:今天早上时间不多了,没空给大家翻译,凑合着看吧,反正我觉得大学生看这些东西应该算比较容易的。没有语法,没有长难句 ^^ 另外一篇比较老的,适合如果英文不愿看,就看看这个吧 目前使用Intel 集成显卡的计算机主要集中在中低端商务台式机和中低端笔记本电脑。这里介绍一下Linux下显卡驱动安装方法。Intel针对集成显示芯片提供了两种驱动程序:i915Graphics和i810Graphics。
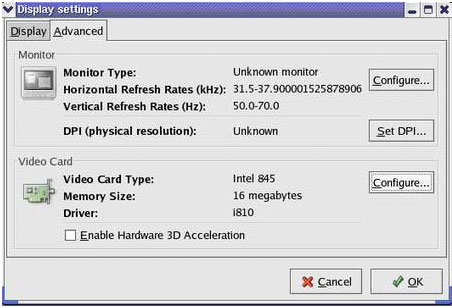
一、 使用82830M, 82845G, 82852GM, 82855GM, 82865G, 82915G芯片组显卡安装 //注:本文原写作时间较早,可能有链接已不适用,需要大家自己去寻找, Intel的上述驱动网提供相应支持,但已不再提供直接链接,转由其Linux显卡驱动组开发(开放)。 程序将自动安装,安装程序将更新 /usr/X11R6/modules/drivers/i810_drv.o(缺省Intel)的驱动程序,使其支持新的芯片组中的显卡芯片。 该配置文件中其他需要注意的地方: 这个部分是设置你的显示器类型,如果不知道自己的显示器叫什么没关系,但需要将显示器的垂直刷新率和水平刷新率正确设置,可以查看显示器的说明书,以上是15寸显示器最常用的频率,如果这个参数设置错误,显示器就会花屏或黑屏。 这里是设置显示模式的地方,包括屏幕的分辨率,和色深,默认使用{zg}的分辨率,如果想使用较低的分辨率,将高分辨率删除就可以了,在这个配置文件中显示器会使用"1024x768" 的分辨率,色深是16位色。有关XF86Config文件的详解可以看它的手册页: 4.启动X-window 二、 使用i810, i810-dc100, i810e, i815芯片组显卡安装 davelv整理 |