If you're using VirtualBox as your favorite virtualization product, you may have heard or noticed that virtual machines you install can be boosted with Guest Additions. When installed, the Guest Additions tools allow your guests to run faster and better, to share mouse and clipboard with the host, to use the Shared folders, and more. All in all, a highly useful ... addition. So we will learn how to use them.
Guest Additions are similar to VMware Tools for VMware Server / Workstation. In fact, I most warmly recommend you read the tutorial, which explains how to install VMware Tools on Windows and Linux guests.
Today, we will see the similar tutorial, focusing on Sun's VirtualBox.
For much more information about virtualization, I most warmly recommend you read my entire section.
Follow me.
The procedure is very simple. Just boot into your guest. Then, in the VirtualBox menu, under Devices, click Install Guest Additions...

The same like VMware Tools, this will popup a wizard in your guest. Follow it through, reboot and enjoy.

After you restart, look for the VirtualBox icon in the system tray.
![]()
Simple, isn't it?
Again, a fairly simple procedure. Repeat the first step. This will mount the VirtualBox Guest Additions ISO (included with the program) as a CD-ROM drive inside the virtual machine.
A file manager windows might popup, depending on your guest configuration, showing all the available options, including Guest Additions for both 32-bit and 64-bit systems, Windows and Linux alike - and even Solaris, not surprising, considering VirtualBox owned by Sun. On most modern Linux distros, the system will auto-mount CD-ROMs and launch file browsers / managers.

Choose the right package for your hardware architecture. In our case, this is x86. Open a terminal window and run the script with root privileges:
See image:

Wait a few moments until the installation is complete. Reboot.

And that's it!
This extra section is necessary, because sometimes people have trouble finding the Guest Additions!
In general, whenever you click Install Guest Additions ..., VirtualBox is supposed to mount the Guest Additions ISO. But this may not happen. There are several ways to rectify the situation:
First, if the Guest Additions are not found, VirtualBox may prompt you to access Internet and download the ISO file. You only have to do this once. Unfortunately, I do not have a screenshots to share on this one.
Alternatively, you can download the image yourself and then manually mount it as a CD-ROM, under the Settings for the particular virtual machine.
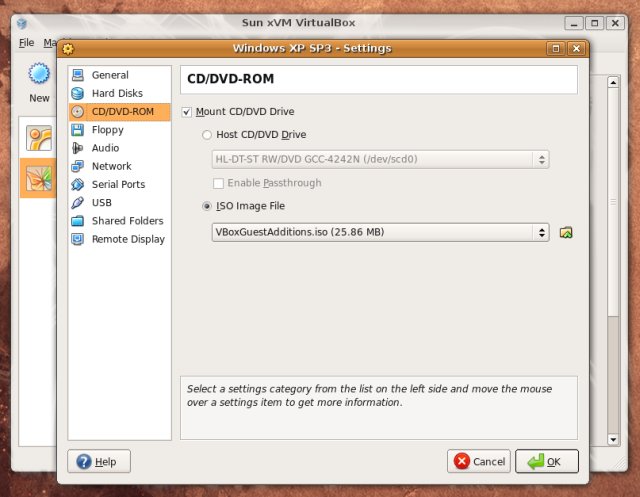
Then, the next time you launch the virtual machine, the Guest Additions will be mounted as a CD-ROM. To install the Additions, on Windows, double-click the executable; on Linux, run the scripts as demonstrated above.

From here, you're on common grounds.
The installation of VirtualBox Guest Additions is even simpler than VMware Tools. Then again, so is the installation of VirtualBox. Either way, the procedure is simple and fast and rather painless. Minimal tinkering with the command line is involved.
Now, you have also learned how to master VirtualBox so that you can benefit most from your guest machines.
Hopefully, this article, as well as the VMware Tools guide, help clear some of the mist. This way, we can move on to more complicated things. Hint: in the next articles, we'll talk optimization, bridged networking ... and even 3D acceleration? Stay tuned.
Cheers.