2010年02月18日 AM 47:55 | 作者:
很久没有关注 Asterisk 了,现在 Asterisk 出了 1.6 版本,有一个较大的变化就是 ,导致有些配置文件名和配置文件放置的地方有了点变化,对于习惯了 1.4 的用户有点不适应,而且好多资料都是按照 1.4 版本写的,比如那个经典免费书:.
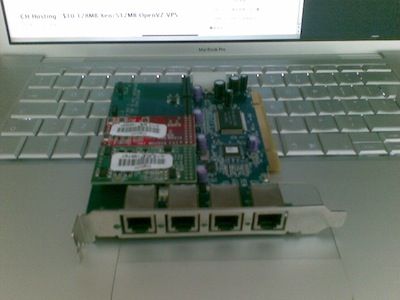
以前写过一篇 的文章,是在没有 Digium 电话卡的情况下做的一个纯 VoIP 服务器。如果有电话卡的话就可以连到 PSTN 网络,这样电脑就可以通过 IP 网络给固定电话(PSTN )打电话。VPSee 用的是 Digium TDM400P PCI 语音电话板卡(见图),有4个口,1个连 PSTN 电话线(FXO),剩下 3个连电话机(FXS)。整个安装过程和配置操作在 Ubuntu Desktop 9.10 上完成。

先安装一些编译 Asterisk 需要的必备包:
# apt-get install build-essential subversion make linux-source kernel-package
再安装 Linux 内核头文件,安装的时候会有提示选择哪个版本的 linux-libc-dev,选择一个和当前内核版本对应的 linux-libc-dev 就可以了:
# apt-get install linux-kernel-headers
Reading package lists... Done
Building dependency tree
Reading state information... Done
Package linux-kernel-headers is a virtual package provided by:
  linux-libc-dev 2.6.31-19.56
You should explicitly select one to install.
E: Package linux-kernel-headers has no installation candidate

# apt-get install linux-libc-dev
安装 linux-headers,同样的,需要从众多头文件版本中选择一个和当前内核版本相对应的 linux header 版本:
# apt-get install linux-headers
Reading package lists... Done
Building dependency tree
Reading state information... Done
Package linux-headers is a virtual package provided by:
...
  linux-headers-2.6.31-19-generic-pae 2.6.31-19.56
  linux-headers-2.6.31-19-generic 2.6.31-19.56
  linux-headers-2.6.31-19-386 2.6.31-19.56
  linux-headers-2.6.31-19 2.6.31-19.56
...
You should explicitly select one to install.
E: Package linux-headers has no installation candidate

# apt-get install linux-headers-2.6.31-19-generic
还需要安装一些包:
# apt-get install libconfig-tiny-perl libcupsimage2 libcups2 libmime-lite-perl libemail-date-format-perl libfile-sync-perl libfreetype6 libspandsp1 libtiff-tools libtiff4 libjpeg62 libmime-types-perl libpaper-utils psutils libpaper1 ncurses-dev libncurses-dev libncurses-gst ncurses-term libnewt-dev libnewt-pic libxml2 libxml2-dev libspandsp-dev libspandsp1
把工作目录切换到 /usr/src/ 下,以后所有操作都在这个目录下进行:
# cd /usr/src/
下载 asterisk, dahdi-kernel, dahdi-tools, libpri 的源代码:
# svn co http://svn.digium.com/svn/asterisk/trunk asterisk
# svn co http://svn.digium.com/svn/dahdi/linux/trunk dahdi-kernel
# svn co http://svn.digium.com/svn/dahdi/tools/trunk dahdi-tools
# svn co http://svn.digium.com/svn/libpri/branches/1.4/ libpri
编译安装 libpri:
# cd /usr/src/libpri
# make clean
# make
# make install
编译安装 dahdi-kernel:
# cd /usr/src/dahdi-kernel
# make clean
# make
# make install
编译安装 dahdi-tools:
# cd /usr/src/dahdi-tools
# make clean
# ./configure
# make
# make install
# make config
{zh1}编译安装 asterisk:
# cd /usr/src/asterisk
# make clean
# ./configure
# make
# make install
# make config
{zh1}检查一下 Asterisk 是否工作以及 Digium 卡的驱动是否装好:
# asterisk -r
...
localhost*CLI>

# lsmod | more
...
dahdi                 199240  11 xpp,dahdi_transcode,wcb4xxp,wctdm,wcfxo,wctdm24
xxp,wcte11xp,wct1xxp,wcte12xp,dahdi_voicebus,wct4xxp
...


